Reviews and recommendations are unbiased and products are independently selected. Postmedia may earn an affiliate commission from purchases made through links on this page.
Advertisement 1

Spookily sweet-and-savoury recipes to serve this haunted holiday.

Reviews and recommendations are unbiased and products are independently selected. Postmedia may earn an affiliate commission from purchases made through links on this page.
Skip the candy this Halloween and, instead, whip up one of these sweet-and-savoury treats shared by Vancouver chefs. From delightfully spooky hand pies to a “scary” scone, they are guaranteed to satisfy your sweet tooth, while also getting you into the haunted holiday spirit.
Article content
Recipe by: Jenny Galloway, owner and pastry chef at Jenny Bakes
1 1/4 cups (6 oz or 170 g) flour, plus more as needed for rolling out
Advertisement 2
Article content
1-2 tbsp (1 oz or 13-26 g) granulated sugar
1/4 tsp (1 mL) finely ground sea salt or 1/2 tsp (2.5 mL) table salt
10 tablespoons (5.20 oz or 147 g) unsalted European butter, diced and chilled
1/3 cup (2.85 oz or 80 g) full-fat sour cream
Optional mix-ins:
1 tbsp (15 mL) lemon zest or 1 tsp (5 mL) cinnamon
1 egg
1 tbsp (15 mL) milk, to finish the crust
Your favourite jam or pie filling
Turn your oven to 400 degrees Fahrenheit. Dice butter into small cubes (smaller than a sugar cube). Place it in the fridge to keep it very cold until ready to use.
Blend flour, sugar, salt, and mix-ins (if using) in a large mixing bowl. If sugar is raw or large-grain such as organic sugar, you may want to pulse it a few times in a food processor. Add about half of the chilled butter to the flour. Using a pastry blender, your hands or a food processor, cut/blend in the butter until it is a sandy texture.
Add the remaining butter. Again, using a pastry blender, hands, or a food processor, cut/blend in the butter until only pea-sized pieces remain. Avoid blending the butter too small. You want some bigger bits to create that flakey crust. If using your hands, squeeze between your thumb and fingers to create long, flat pieces — those are ideal for a flakey crust.
Advertisement 3
Article content
Add the sour cream and stir until thoroughly mixed and you can form it into a cohesive ball with your hands. If it won’t come together, add another tablespoon of sour cream. Once the dough can stick together, pour out onto a clean surface and gently shape into a 6-inch disc. Use the edge of your hand to get smooth sides. Wrap well in plastic wrap and chill for at least 1 hour, or up to 2 days. You can also freeze it for up to 1-2 months.
When ready to use, place the crust on a lightly floured, clean work surface or rolling mat. Sprinkle a little more flour over the top. Begin rolling out the dough, rotating the rolling pin as you go. Be sure to flip and rotate the dough every so often, sprinkling a tiny bit more flour as needed to keep it from sticking and ensure you’re rolling evenly.
Use your favourite cookie cutters (at least 4-inch in size) to cut the shapes. You need two of each shape, one for the base of your pie and one for the top. Cut eyes, nose, mouth or anything you like on the top shape.
Whisk 1 egg with 1 tablespoon of milk in a small saucer. Place the base on your tray already lined with parchment paper. Add a little bit of your favourite jam in the middle of the shape. With your finger dipped in the egg mix, line the outside of your shape. Place the top shape and gently press the sides with your finger or a fork to seal both sides. Brush the remaining egg mix on top of your pies. Make sure to add just a little bit of it. You can add sugar on top if you wish. Once you have all your pies ready, freeze the entire tray for 15 minutes.
Article content
Advertisement 4
Article content
Directly from the freezer, bake at 400F for 15 to 20 minutes or until they are golden and the filling is bubbling. Carefully remove from the oven and let them cool for at least 30 minutes before serving.
Yields about 6-7, 4-inch hand pies

Recipe by: Hina Yamauchi, head baker of Fufu Pancake Cafe
2 tbsp (30 mL) miso paste
1/2 cup (125 mL) cold milk
2 eggs
2 cups (500 mL) all-purpose flour
1 tbsp (15 mL) granulated sugar
2 1/2 tsp (12.5 mL) baking powder
1 tsp (5 mL) Hondashi (bonito soup stock) or 2 g bonito flakes
1/2 cup (125 mL) cold unsalted butter, cubed
1 cup (250 mL) cheese, cubed (cheddar, mozza etc.)
2-3 stalks fresh green onion, chopped
Everything bagel seasoning
Preheat oven to 400F. Place miso paste in a bowl, add milk a little at a time, and stir to ensure a homogenous mixture. Add eggs and stir until fully combined. Use an emersion blender if one is available. Set the liquid mixture aside, and keep cold.
In a food processor, combine flour, sugar, baking powder and bonito. Add butter and pulse until broken down into pea-sized crumbs. Transfer the dry mixture to a large bowl and toss in cheese and green onions.
Advertisement 5
Article content
Add about 3/4 of the liquid mixture and toss gently with a fork. Add liquid a little at a time until most of the dry mixture is moistened and starting to clump together. Turn the dough out onto a floured counter, and firmly pat the dough into a circle, about 1-inch thick. Cut out 8 wedges with a knife, apply an egg wash, or brush the tops with leftover milk, then sprinkle with everything bagel seasoning.
Place scones on a baking tray 1 to 2 inches apart. Bake at 400F for 18-23 minutes or until tops are browned and scone is baked through. Cool for 10 minutes before serving. Best if consumed immediately.
Makes 8 scones

Recipe by: Kiko Nakata, pastry chef at Tall Shadow Bakery
2 1/3 cup (290 g) all-purpose flour
1 1/2 tbsp (20 g) cornstarch
3/4 tsp (5 g) salt
1/2 tsp (2 g) ground nutmeg
1/2 tsp (2 g) ground cinnamon
1/2 tsp (2 g) ground ginger
1 tsp (5 g) vanilla paste/extract
1 cup (230 g) butter, room temp
1 cup (200 g) granulated sugar
1 egg
Beat together butter and granulated sugar until fluffy. Add vanilla and egg, and mix until fully combined. Separately, whisk together all dry ingredients. Add dry ingredients gradually and mix until just combined.
Advertisement 6
Article content
Refrigerate dough for at least an hour before rolling out and cutting into your Halloween-inspired shapes.
Bake at 300F until lightly golden, usually around 10-15 minutes depending on the size of the cookies. Rotate the cookies at the midway mark to ensure an even bake. Decorate with icing sugar as desired.
Makes about 20 cookies

Recipe by: Isabelle Valencia, pastry chef at Miku Restaurant
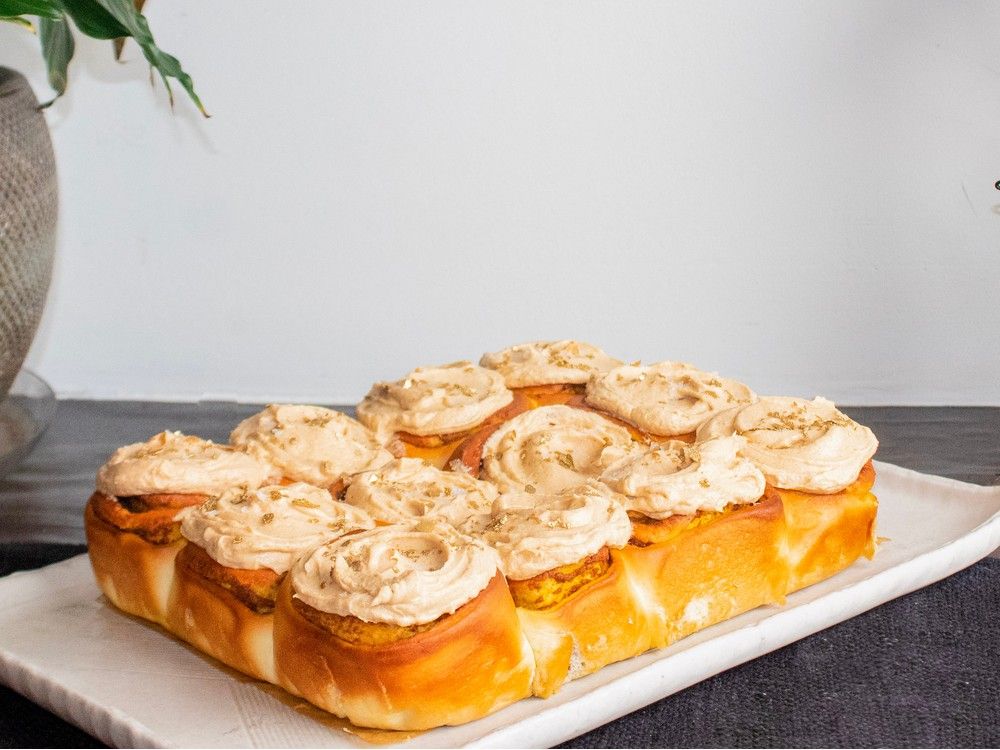
Pumpkin Cinnamon Rolls
1/2 cup (125 mL) warm water
2 1/4 tsp (11 mL) instant yeast
1/3 cup (80 mL) sugar
1/2 tsp (2.5 mL) salt
1/2 cup (125 mL) warm milk
1/4 cup (60 mL) butter, melted
2 eggs at room temperature
3 3/4 cup (930 mL) all-purpose flour
Pumpkin Cinnamon Filling
2/3 cup (160 mL) pumpkin puree
1/2 cup (125 mL) butter, softened
1 tbsp + 1 tsp (20 mL) ground cinnamon
1/2 cup (125 mL) brown sugar
In a small bowl, combine warm water, yeast, and sugar. Let sit for 10 minutes.
In a bowl of a stand mixer with the dough hook attachment, combine all remaining cinnamon roll ingredients on low speed. Once the dough is starting to form, increase the speed to medium. Knead for 12 minutes.
Advertisement 7
Article content
Grease a large bowl with baking spray. Transfer the dough in the greased bowl and cover with plastic wrap. Let rise in a warm place for 1 hour and 15 mins or until doubled in size.
While waiting, combine all the ingredients for the filling and prepare the baking tray. Grease and line a 8×12 baking pan with parchment paper.
Once the dough has risen, punch down to release any bubbles. On a lightly floured surface, roll out the dough into a large rectangle. Roughly around 18 inch by 13 inch. Evenly spread the filling reaching the very edge of the dough. Roll the dough tightly by rolling it up and tugging it slightly. Once rolled, cut into 12 even pieces. Transfer pieces onto the prepared pan. Cover with plastic wrap and store in a warm place for an hour.
Preheat the oven to 375 F. Once proofed, uncover the cinnamon rolls and bake for 25 mins or until golden. Cool down before frosting.
Salted Kinako Cream Cheese Frosting
2/3 cup (160 mL) cream cheese(room temperature)
1/3 cup (80 mL) cup butter(soft)
1/4 cup (60 mL) kinako powder
2/3 cup (160 mL) icing sugar
1/8 tsp (1/2 mL) salt
1/4 tsp (1 mL) ground cinnamon
Advertisement 8
Article content
1/4 cup (60 mL) heavy cream
In a medium bowl, cream together cream cheese and butter. Once fluffy, add kinako, icing sugar, salt, and ground cinnamon. Mix well. Slowly whisk in heavy cream until fluffy. Spread on cooled cinnamon rolls and enjoy.
Makes 12 buns.

Recipe by: Adam Gold, cafe manager at Novella Coffee Bar
2 oz (60 mL) espresso
Spice blend (note, a pre-made pumpkin spice blend can also be used)
1/2 cup (60 g) cinnamon sticks
1/2 cup (32 g) nutmeg
1/4 cup (16 g) allspice
1/4 cup (16 g) clove
1/4 cup (27 g) ginger
Syrup
2 cup (500 g) pumpkin puree
5 cup (1,000 g) white sugar
5 cup (1,200 g) water
1 tbsp (20 g) vanilla paste
1/4 cup (45 g) spice blend
2 tbsp (15 g) ginger
2 tbsp (10 g) cinnamon
2 tbsp (15 g) cardamom
Grind spices in a spice grinder until fine. Add cardamom, cinnamon, ginger, spice blend, and vanilla paste to water in a pot. Bring to a boil and reduce. Add white sugar and pumpkin puree and reduce into syrup.
Pumpkin Spice Latte
Place 2 tbsp of pumpkin spice syrup into a cup. Add 2 fl. oz of espresso. Mix pumpkin spice syrup and espresso and pour into a serving mug. Steam milk of choice and pour into the serving mug. Halloween latte art, optional. Sprinkle a touch of the spice blend on top of the pumpkin spice latte. Enjoy!
Serves 1
Article content
Source: vancouversun.com
Comments
Postmedia is committed to maintaining a lively but civil forum for discussion and encourage all readers to share their views on our articles. Comments may take up to an hour for moderation before appearing on the site. We ask you to keep your comments relevant and respectful. We have enabled email notifications—you will now receive an email if you receive a reply to your comment, there is an update to a comment thread you follow or if a user you follow comments. Visit our Community Guidelines for more information and details on how to adjust your email settings.